1 Stamp, 3 Cards
Hi Everyone: Well, I have spent most of the day down in my stamping place today. Actually I am into my vacation and still have another week and a half to go. This must be what it is like to be retired although I really miss the people that I work with.
Today, I thought I would use some of the new goodies from the Holiday Mini. There is some great stuff happening in this catalogue. Check is out HERE.
Paper: Cherry Cobbler, Very Vanilla, Deck the Hall DSP
Ink: Early Espresso Craft Ink
Accessories: Clear Embossing Powder
This card uses the top right hand corner of the stamp and is stamped with Early Espresso Craft Ink and heat embossed with clear embossing powder. The poinsettias are cut from the Deck the Halls DSP and layered on top.
Easy!
Tomorrow I will post the other cards that I did.
Have a nice evening.
Until next time…
Karen
Happy Halloween
As we get into September, the rest of the year seems to just fly by, not that the first part of the year didn’t. Where did Summer go?
During the period of September 1 – October 18, 2010, Stampin’ Up! has a great promotion for new recruits during this period.
You will receive a FREE craft tote (valued at $49.95) with the purchase of your Starter Kit. And because it’s free, there is no shipping and handling charges on it.
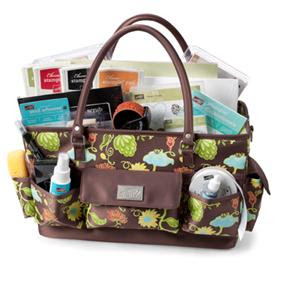
Greenhouse Gala Craft Tote Description
• 100% twill nylon exterior; 100% nylon interior
• Dimensions: 15-3/4″ x 7-5/8″ x 8-7/8″
• Includes attachable shoulder strap for easy transport
• Center section fits 12″ x 12″ card stock, Craft Keepers, and Paper Cutter
• Outside pockets fit extra-large punches perfectly
• Outside flap pockets offer secure spot for accessories
• Back zipper pocket holds up to seven Stampin’ Pads
I have this Craft Tote and it is a wonderful gift from Stampin’ Up! Check HERE for all the details on becoming a Stampin’ Up! demonstrator
So, let’s get into Halloween with this cutey. Who could resist these Greeting Card Kids.
Stamps: Greeting Card Kids (W – 119887, C – 120633), Teeny Tiny Wishes (W – 115370)
Paper: Early Espresso, Always Artichoke, Cajun Craze, Very Vanilla
Ink: Soft Suede, Basic Black
Accessories: Big Shot, Medium scallop circle die, Corner Punch, Modern Label Punch, Spider Web Embossing Folder, SU Markers – various colours, Blender Pen
On the scallop circle, the edges are outlined using the Early Espresso marker. If you do this from behind, then you don’t miss and end up with a line on the front…like I would. Each scallop is then dotted with the Early Espresso marker.
The little girl’s skirt is paper pieced to give it some dimension and bring it forward. Paper piecing is stamping a duplicate image and cutting out the piece that you want to include in your image and attaching to the main image….how easy is that!
How I love the Big Shot and all the fun accessories. This card uses the new Spider Web embossing folder that is available in the Holiday Mini on page 6.
Have a great evening and thanks for taking a visit.
Until next time…..
Karen
Happy Anniversay Mom and Dad
Hi: Right now the sun is shining and it is sure getting cool over night. I like the cool nights and the warm days and usually September is a beautiful month here.
The Holiday Mini Catalogue is available to order from now and they have some great new products to help you celebrate Halloween and Christmas. Stampin’ Up! has now offered materials in two different Christmas designs (Deck the Halls and Candy Cane Christmas) to add to your cards or make 3-D projects. The Big Shot is capable of handling 8 layers of fabric and using the new die cuts (medium and small scallop squares and the tasteful trim) could certainly help to get your Christmas 3-D projects off to a good start. To make the fabric stick, there is multipurpose adhesive sheets that you add to your fabric before running through the Big Shot, then peel off the backing and viola, stick it to your project. These products are featured on page 16 and 17 of the Holiday Mini. Check out the Holiday Mini by clicking HERE.
It’s also time to book your workshops for the up coming fall season. Christmas Cards on your list? Contact me to book a workshop or order through my Stampin’ Up! website.
The card of the day is an Anniversary card for my Mom and Dad who will be celebrating their 65th wedding anniversary this month.
Stamps: Artistic Etchings (W – 118517, C – 120573)
Paper: Sahara Sand, Bravo Burgundy, Perfect Plum, Very Vanilla, Newsprint DSP
Ink: Perfect Plum, Bravo Burgundy
Fun Accessories: Versamark, Basic Pearls, Word Window Punch, Modern Label Punch, Dimensionals, Clear Embossing Powder
The card base is 5 1/2″ x 4 1/4″.
The Newsprint DSP paper is stamped with the key from the Artistic Etchings set using Bravo Burgundy and edge with Perfect Plum ink to give a vintage look.
All other images were stamped using versamark and perfect plum ink and heat embossed with clear embossing powder. The crown is cut using the paper snips (great pair of scissors for getting around tight spots), attached. The pearls add a finishing touch and cover up an oopsy (LOL). Finally the layers are attached in a random display.
Happy 65th Anniversary Mom and Dad
Until next time……
Karen
Great Vacation on Vancouver Island
Hi Everyone: Well, I have just returned for a wonderful week on Vancouver Island. The weather was incredible, with only 1 day of stormy weather. We spent 3 days at a cabin on the beach, just relaxing and enjoying the view, the water and the sun.
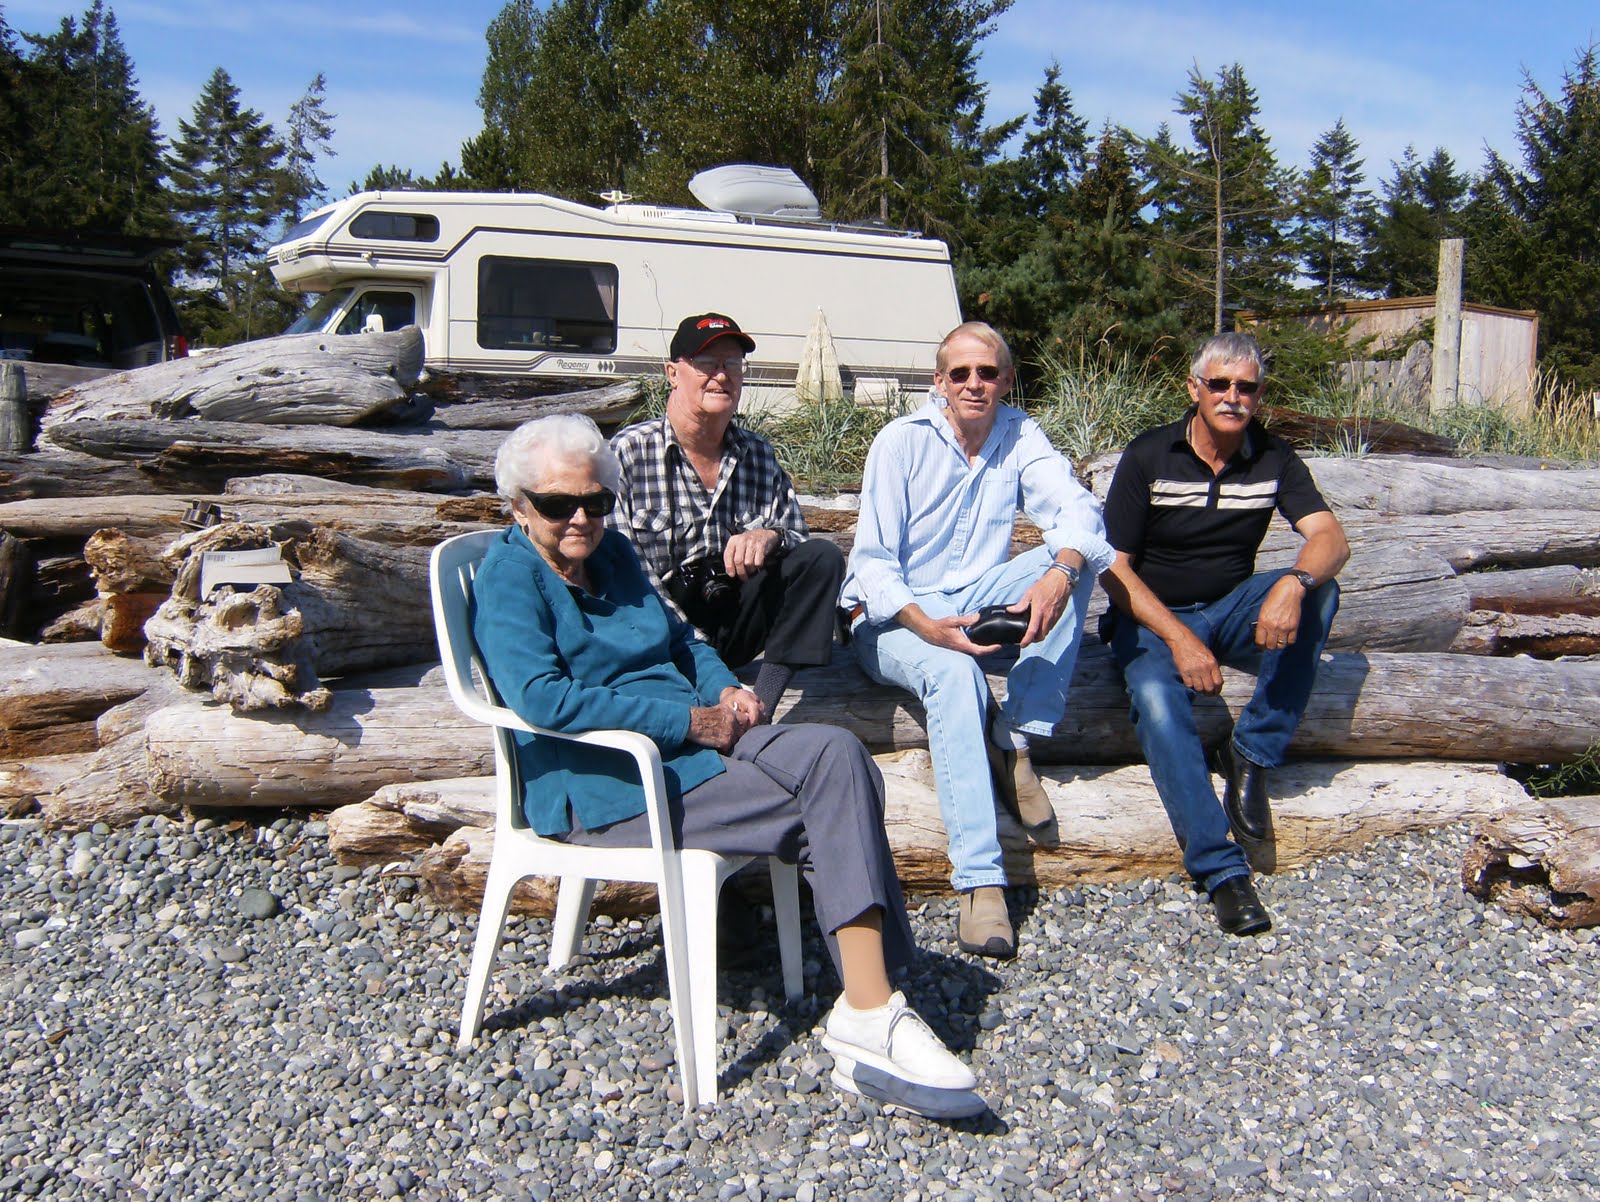
This is a picture of Lloyd with his Mom and Dad and brother-in -law Clive. Lloyd’s sister Karen and her grandson Cody are likely off digging in the sand next to the water.
Now this is the picture of the next day with the surf up, the wind and the storm that blew through. Thank goodness it only lasted a day. I know that it was not as bad as the people on the East coast are experiencing with Earl. Hopefully the damage for this hurricane will not be bad.
Yesterday, we went whale watching and saw tons of whales, porpoises, California sea lions, and other wild life…no bears. We were in what is knows as a cigar boat with about 8 others for about 3 and a half hours. The water was calm, the sun shinning and we managed to get wind and sun burns but a good time was had by all.
Here is a picture of Cappuccino. He came within about 30 yards of the boat. You can see one of the motors in the bottom right hand side of the picture. These whales are used to the boats and the people and take no notice unless they are chased. So if you just sit there they will swim around the boats. They are as curious about us, as we are about them . All in all we saw about 12 whales. The tour guide even put the microphone down into the water so that we could hear them talking. Just amazing.
All the whales are named, although they do have official names and Cappuccino’s official name is K-21. This means he was the 21st whale identified in the K-Pod. These whales are known as resident whales as they are usually off Vancouver Island for about 4 months during the summer. I didn’t know this but all whales are a distinguishing mark near their dorsal fin so when they come up for air you can tell who is who. Also, there is a matriarch who is in charge of the pod. For K-Pod, this is “Granny” and apparently she is 99 years old. Cappuccino is 24 years old. When a whale is born into a Pod, they stay with the Pod for as long as they live.
Tomorrow I will get to posting some more cards but for today, I wanted to share this great experience. And I still have 2 weeks of vacation left to do some more cards.
Until next time……
Karen
Tangled Up in Creativity Challenge
Before I get started on my post, I just have to do this….is only 4 months till Christmas! There, I feel better now.
There will be a new Stampin’ Up! Holiday Mini available to order from on September 1st and it loaded with goodies. Stay tuned for some sneak peek cards and gifts. Contact me if you would like a catalogue to touch and feel.
Remember too, that the goodies in the Summer Mini are available for order until August 30th.
It time for another challenge for the Tangled Up in Creativity group. This challenge is hosted by Danie, so check out her blog for the rules of the challenge. The challenge is connected to Prostrate Cancer Awareness Month in Australia and is open to all.
![]() |
| Woodland Friends |
Stamps: Forest Friends (W – 113748), Teeny Tiny Wishes
Paper: Whisper White, Pacific Point, Celebrations DP
Ink: Early Espresso
Fun Accessories: Whisper White Grosgrain Ribbon, Word Window Punch, Modern Label Punch, Designer Button, Flower Brads.
The inspiration and design for this card came from MOJO 153.
That’s it for today, so until next time…..
Karen
Anniversary #2
Hi Everyone: It’s awhile since I last did a post. I have been out of town on business (Las Vegas – I know, someone has to do it). While it may sound exotic, it was hot, I had long days, and I’m glad to be home.
The card I’m sharing today, is the second in a line of anniversaries that are happening.
Vintage, Shabby Chic – Tangled Up in Creativity Challenge
Hi Everyone: This week’s Tangled Up in Creativity challenge is hosted by Rose over at Pink Lemonade. The challenge is to make your card in the vintage or shabby chic look. I hope my card is vintage enough.
This card is the first of several anniversaries that are happening during August and September so thought I would get an early start.
I stamped the Newsprint DSP using a stamp from Pedaling Past inked with Cherry Cobbler, tearing along one edge and sponging with Soft Suede. The Pedaling Past stamp is still available until August 31st in the Summer Mini Catalogue….don’t miss out.
To continue in the vintage mode, the Cherry Cobbler card stock (I am really liking this colour) is torn along one edge and sponged using Soft Suede, the bicycle built for 2 is stamped with versamark and Early Espresso and embossed using Clear Embossing Powder.
Finally, the paper flowers made using the Big Shot and the Birds and Blooms Die Cuts. Each flower has 3 layers which were sprayed with water until pliable, scrunched to distress them. The layers are held together with a brad and then scrunched again and left to dry overnight. The flowers feel like leather once they dried. The leaves are punched using the wings from 2-step bird punch. (another use for the bird punch – page 202 of the IB&C.
So until next time….
Karen
I think it is time to clean up my stampin roost
Hi Everyone: Does the sudden realization come to you that you need to clean up your stamping or craft hideaway? Mine did yesterday. As I was making this card, it was, put something down and then have to look for it the next time I needed it. Like tape, stamps, cardstock…all of it. So before I can do any more cards, I must….
My card today is inspired by MOJO151 and Curtain Call Color Challenge Act 42. The colours are peach parfait, pear pizzazz (both are the new In Colours from Stampin’ Up) and can be ordered HERE.
Well, the smoke has finally cleared and the air quality reading to normal once again. However, we are going to heat up again tomorrow, so who knows what may happen with the fire situation.
Until next time…..
Karen
Happy 1st Anniversary
Hi Everyone: The card I am sharing today is for friends who are celebrating their 1st Anniversary. I wish them happiness and love.
The inspiration for this card came from MOJO150 and Curtain Call Color Challenge Act 41
Paper: Whisper White, Crumb Cake, Marina Mist, Night of Navy
Ink: Night of Navy, Marina Mist
Accessories: Scallop Edge Border Punch, Butterfly Punch, Oval Punch, Scallop Oval Punch, Big Shot, Vintage Wallpaper Embossing Folder, Basic Pearls
I used a new technique (at least new to me). I sponged the Vintage Wallpaper EF with Night of Navy ink and used the Crumb Cake in the EF. I do like how it turned out.
The basic pearls are new to the Stampin’ Up! product line and add a bit of elegance.
The smoke from the fires is still with us. Yesterday was very brutal, air quality is very low and you could hardly see the hills around the valley. It is supposed to rain this weekend, however, we are also to get some thunderstorms with lightening and of course there is the possibility of more fires. I am keeping my fingers crossed.
So until next time….
Karen
Tangled Up in Creativity
Hi Everyone: This card is for the Tangled Up in Creativity challenge. The challenge is to make a CAS (Clean and Simple) card using one picture or one sentiment and keeping the embellishments to a minimum.
I am not quite if I followed the instructions to the letter. Cards with few embellishments are a challenge to me. So anyways, here is my creation.
Stamps: Awash with Flowers – W – 117062, C – 120549
Paper: Whisper White, Wild Wasabi
Ink: Basic Black, So Saffron
Fun Accessories: Scallop Trim Corner Punch (11870), Scallop Trim Border (118402), Markers – Pink Pirouette, Wild Wasabi
The card base is 51/2″ x 41/2″ on whisper white.
The green layer in wild wasabi is 5 1/4″ x 3″ and punched in the top corners using the Scallop Trim Coroner punch.
The white layer is whisper white is 2 3/4″ x 3 3/4″, punched along the bottom with the Scallop Trim Border punch and stamped with Awash with Flowers stamp ( a 2-step stamp).
The pink flowers and the green leaves stamps were inked using the markers and the “Huff” technique.
All products used are Stampin’ Up! and can be purchased through my Stampin’ Up! website …Here
We are experiencing forest fires in central BC and the valley here in Kamloops is very smokey. Hopefully it will rain soon which is help the forest fire situation and also help the smoke. Not that I am advocating rain for any extended period of time.
So until next time…..
Karen
PPA53-A Monochromatic Color Challenge
Hi Everyone. Who can believe it that it is the last day of July!!!
Today’s post is all about creating a monochromatic colour card using the colour purple. It is not as easy as you think, however, using Stampin’ Up! products, which are all colour coordinated, makes it somewhat easier.
Stamps: Vintage Vogue, (117690 – Wood-mount, 118598 – Clear mount), Artistic Etchings (118517 –Wood mount, 120573 –Clear Mount), Perfect Punches (117202 – Wood Mount, 120516- Clear Mount
Paper: Whisper White (119707), Concord Crush (119797), Perfect Plum (119704)
Ink: Perfect Plum (101437)
Fun Accessories: Corner Punch (11987), Modern Label Punch (119849), Scallop Trim Corner Punch (11870), Scallop Trim Border (118402), 1 ¾” Circle Punch, (119850), Versamark (102283), Clear Embossing Powder (109130), Big Shot – (113439), Texturz Plates (114512)
Background on card front is watermarked using Versamark and the flourish from the Vintage Vogue Stamp Set.
Perfect Plum is punched on all four sides utilizing the Scallop Trim Corner Punch and The Scallop Trim Border Punch and run through the Big Shot with the Texturz Background Plate.
Whisper White corners rounded with the Corner Punch and stamped using the friends stamp from the Vintage Vogue stamp set using Versamark and Perfect Plum ink and embossed with Clear EP.
Concord Crush was stamped with the flourish circle from Artistic Etchings using Versamark, embossed using Clear EP and punched out with the circle punch.
Whisper White is stamped with Perfect Plum ink using Perfect Punches stamp set and punched out with Modern Label Punch.
You can order all these products HERE 24/7
Check out the promotion for the month of August. Hold a workshop during the August and receive $35 in additional HOSTESS gifts with $450 in sales. This offer is not available if you order on line. Contact me directly with your order.
Hold a virtual workshop – contact me for a catalogue, collect your orders from your friends and submit the orders to me.
So until next time…..
Karen
Special Birthday
Hi Everyone: Is it hot where you are? Because it is hot here. It’s nice but I could stand it to be a bit cooler. Oh well, give us a couple of months and we will be saying “It’s too cold”.
My post today is a birthday card that I did for one of my best friend’s 60th birthday. Now that I have told you her age, I better not reveal her name.
Recipe
Stamps: Great Friends
Paper: Whisper White, Bravo Burgundy, DSP, Garden Green, White Shimmer
Ink: Rich Razzleberry, So Saffron
Accessories: Big Shot – Lattice Embossing folder, Label from the Match Box Die Cut, Organza Ribbon, 2 Step Bird Punch, Brads, Butterfly Punch, Basic Black marker
Layer 1 measures 5 ½” x 8 ½” and folded in half to make the front of the card 4 ½”.
The Bravo Burgundy layer was embossed using the Lattice Embossing folder and the Big Shot. A strip of whisper white was layered vertically and the DSP layered horizontally.
The pansies were made using the butterfly punch and the technique can be found HERE
The pansies and leaves are attached. The sentiment is stamped using Bravo Burgundy ink on whisper white which was cut using the Big Shot and the label from the Match Box die cut. Lastly, the bow made from the Organza ribbon was attached.
All products are Stampin’ Up! and can be purchased here
Until next time…..
Karen
Christmas in July
Hi Everyone: Christmas in July? The Tangled Up in Creativity group were challenged to make a Christmas card and not use traditional colours like forest green, red, red, so I decided to use a citrus green and teal. I really enjoyed making this card and if I don’t say so myself, it turned out kinda great!
Recipe
Stamps: Delightful Decorations, Teeny Tiny Wishes
Paper: Whisper White, Wild Wasabi, Taken with Teal (retired), Bridle Specialty (retired)
Ink: Taken with Teal (retired)
Accessories: Ornament Punch, Oval Punch, Scallop Oval Punch, Scallop Edge Punch, Big Shot – Texturz Plates, Ribbon (other), Sponges, Wild Wasabi Marker, ¼” Grosgrain whisper white ribbon
Layer 1 – Card Base – Taken with Teal – 4 ¼’ x 5 ½”
Layer 2 –Whisper White 4” x 10 1/4”, scored and folded at 5 1/8” and top half of card front randomly stamped using the marker to ink the stamp.
Layer 3 – Wild Wasabi run through the Big Shot using the Texturz plate, a strip of Bridle Specialty paper sponged with Taken with Teal and polished.
Layer 4 – Wild Wasabi – 2” x 3 1/4”
Layer 5 – Whisper White – 1 7/8” x 3” stamped using the Delightful Decorations stamp inked with Taken with Teal. A second ornament was stamped and punched out using the Ornament Punch. A piece of whisper white ribbon is attached to the punched ornament and attached alongside the stamped ornament image with dimensionals.
The sentiment is stamped on Whisper White using Taken with Teal ink, punched out with the oval punch and layered on a piece of Taken with Teal punched using the oval scallop punch.
Finally a piece of ribbon is attached to the top of the ornament ribbon.
So, now I’m off to post this on Gardner’s Basket website
Until next time……
Karen
Using the Stampin’ Up! 2-Step Bird Punch
Hi Everyone. The weekend is almost gone, again!!! I did have some time this weekend with my daughter. We had our toes done and it was very nice to spend the one-on-one time with her. Between her busy schedule with 2 small children and mine, we don’t get a lot of quality time for just the 2 of us. It was wonderful to spend the time with her.
I, at least, had time to get 1 card completed and I used the MOJO Monday 147 sketch and the Curtain Call Color Challenge 38 as inspiration. Although I am too late for the Curtain Call Color Challenge , I think I have some time to upload to the Mojo Monday link.
Paper: Whisper White, Regal Rose, Sweet Pea DSP, Rich Razzleberry, Certainly Celery
Ink: Rich Razzleberry, Pumpkin Pie
Accessories: Scallop Trim Border Punch, 1 ¾” Circle Punch, 2-Step Bird Punch
Layer 1 measures 5 ½” x 8 ½” and folded in half to make the front of the card 4 ½”.
Layer 2 is done with Regal Rose and the top and bottom punched with the Scallop Trim Border Punch
Layer 3 is the Pumpkin Pie from the Sweet Pea DSP
Layer 4 is Rich Razzleberry which is cut into 4 squares and used as a mat for layer 5.
Layer 5 in Whisper White is also cut into 4 squares. Prior to cutting into the 4 squares, using the 2-step Bird Punch, randomly stamp the bird using Rich Razzleberry in.
Punch the bird and the wing from the Sweet Pea DSP and the leaves and stems from Certainly Celery. These are layered on the 4 whisper white squares.
The sentiment from the Pedaling Past stamp set is stamped on Certainly Celery using Pumpkin Pie ink and punched out using the circle punch. Trim the circle to a half circle and attach to the card with a dimensional
Tip Of the Day
Want to know what to do with those strips of card stock you end up with after making a card and/or project? Use the 2-Step Bird Punch and punch stems and leaves to use for future projects.
Until next time……
Karen